One day after making this really cool looking Kumihimo bracelet, I was just not satisfied with the clasp that I used. I thought to myself there are so many cool looking clasps out there and I want to be using them. However the glue I was using was not going to work with them. I spoke to others who were using these cool looking clasps, and the consensus was the same about which glue they used. Everyone came back with 5 Minute 2 Part Epoxy.
My first reaction was how difficult is this actually going to be? Do I need supervision to use it? Let's just say that there are certain things I'm not allowed to play with by myself. Fire, knives, SuperGlue, and electricity just to name a few.
I went to the local hardware store and picked myself up Clear 5 Minute 2 Part Epoxy. The one I purchased has the syringe. While you can work with this, I do recommend finding one that has 2 separate tubes. Brands on this make no difference.
Here are easy instructions on how to use it:
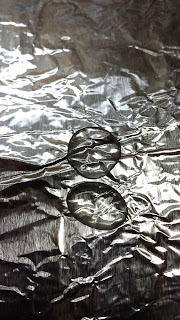
On a piece of aluminum foil place two equal parts of epoxy. Mix them together with a toothpick.
Take the toothpick with epoxy on it, fill the clasp end approximately 2/3 full, covering all insides of the end cap/clasp. Place a small portion of the epoxy around the unbeaded braid portion making sure not to get any on the beads.
Place the braid in the clasp centering it, wiping off any excess epoxy with a paper towel.
Hold in place for a few minutes. (I like to use my vise and a "helping hand" for this portion.) You will feel the epoxy starting to harden at which time you may set it aside to finish curing for 24 hours.
By using epoxy, you can buy whatever type of end cap/clasp you love and make that jewelry piece look as stunning as you want it to be.
Enjoy your Braiding Journey!
Deborah Shipp
DMK Artisan Jewelry


I like to print and keep your news letters and tips. When you print them on a black back ground my printer won't print them. Is there anyway you can do it with a white back ground. I find them useful to look back on. I also would like to continue getting them. Thanks
ReplyDeleteSorry for the delay, and thank you for informing me about the background. I have updated it. Please let me know if this is better.
DeleteDeborah